Mastering your personal layering comfort is one of the most difficult aspects of backcountry travel. Too many clothes and you’re soaking yourself from the inside out. Too few and you’re freezing your little tootsie off. No bueno either way. Half of backcountry travel is learning how to layer.
My first day backcountry skiing was at the edge of a ski resort. We climbed for 500 feet (maybe) before I was completely wiped and soaked from sweat. We stopped and I immediately stripped layers. Then we sat while my heart recovered. Three minutes later I was a popsicle, frozen enough to require assistance zipping my coat. We started moving, and in short order I was overheating. Again.
I regret to admit I continued this cycle on more than a few trips. Eventually I got the hang of it, learned a few tricks, and figured out my darn layering program. Here’s what I know:
For backcountry travel, consider three categories of layers:
Base Layers
Base layers are just what they sound like: layers at the bottom of your layering pyramid. These are generally undies, socks, and long johns. Personally I don’t like keeping track of multiple pieces, so I wear a built-in fitness top and yoga shorts on the bottom. On a very warm day (think: summer volcano skiing), this will be about all I wear – in tandem with a ton of sun screen.
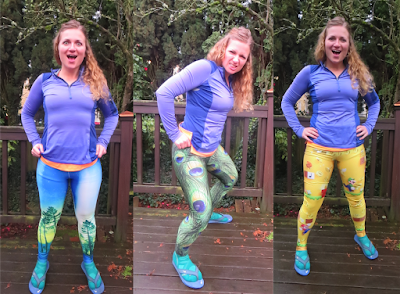
On cooler days, I add a secondary base layer. I love a half-zip top with thumb holes, and instead of your traditional (and expensive) long johns, I like to buy ridiculous leggings. They’re 25% the price, insulate almost as well, and make it impossible to have a bad time. I’ve also found the tight weave makes them perform particularly well in windy conditions.
Important things to note:
Cotton is your worst enemy in the outdoors. It doesn’t breathe and will trap moisture close to your body. Cotton = bad. For the best warmth, go with a wool base layer. Smartwool, Ibex, and Icebreaker are all wool-specific brands. Wool – even the really expensive good stuff – makes me itchy, so almost all of my things are polypropeline (and more realistically, spandex).
Other than material, you also want to consider clasps/hooks/join seams. Pants and sports bras can be especially troublesome. Just remember: many more layers go on top of your base layers, and you’ll be carrying a pack which cinches around the waist and puts weight on your shoulders. Avoid wearing clothing with extra frills in these areas.
You’ll also want to consider fit. Avoid loose fitting items as they create air pockets (which can hold in cold air. But don’t go too tight – you want to be able to move.
Kristina’s favorites: LEGGINGS! My new Black Diamond Equinox Shorts. REI quarter zip top.

Insulation
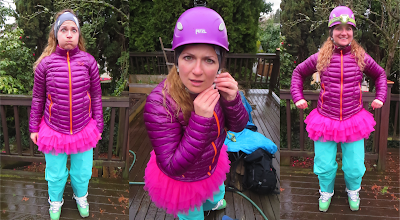
Insulating layers are also exactly what they sound like – layers to keep you insulated and warm. I love insulation, because your options are endless: fleece, down, wool, synthetic fill, the retro sweater your grandmother knitted, a tutu. If it keeps you warm it counts as insulation.
I always ski with a backpack, and part of the reason is because different conditions call for different layers. If I’m working a lot (aka hiking) I want a fleece layer, because it wicks moisture while keeping me warm. If it’s cold, I want my synthetic or down jacket. If I want to look cool, obviously I’m wearing grandmother’s knit sweater. So what do you do when the day calls for various conditions? Backpack = ability to carry all of the layers. And generally my pack will have my fleece and a down/primaloft layer so I can swap out what’s needed.
Important things to note:
Down – traditional goose down – is completely worthless when it gets wet. If you travel in damp climates, you’re better off to buy synthetic fiber. That said, if you can pack a down layer in a waterproof pouch for when you really need it. It can be a life saver. Note: my favorite piece of gear is the down skirt. I break this out in the evening generally, after a day in the backcountry, to warm my bum and provide that extra layer where women need it most. The down skirt has changed my camping life.
Also, things don’t need to be expensive. Just like my “backcountry leggings”, I occasionally will use a pair of (yes, cotton) leg warmers from Goodwill to keep the snow out of my boots. Find things that work for you.
Kristina’s Favorites: TUTUS (for safety)! Mountain Hardwear Ghost Whisperer Down. This rad fleece I bought from MacPac in New Zealand.

Shells
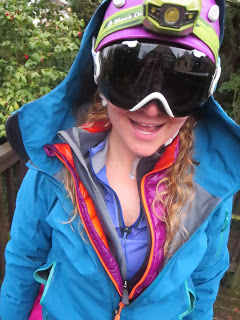
Shells are the outer layer of your “backcountry costume” and are really supposed to keep the insulation in and the wet, damp, coldness out. When it’s snowy or rainy or windy, shells make you feel like you’re living in your own personal tent.
Shells come in all prices and features, and personally I prefer full zip pants (so you can remove them without taking off footwear) and jackets with ample-but-not-excessive pockets and pit zips (zippers to air out your armpits).
Important things to note:
Shells come in two different types: hard shells and soft shells. The descriptions are exactly what you think – hard-shells serve as stronger barriers to the elements, whereas soft-shells are good if you are in less extreme conditions. For my purposes, I use hard shells, which are designed to keep moisture out, but they’ll keep moisture in too. Carefully evaluate both your activity and the conditions before choosing to wear a shell. Sometimes it’s better to be wet from the outside-in than the inside-out.
Kristina’s favorites: I’m just a really big fan of Mountain Hardwear and Arc’teryx gear. Find a fit, style, and color that work for you.

Bonus
As you can see, I like to wear a lot of layers, AND I like to talk about them. So here are a couple of bonus pieces of “advice”:
- Safety equipment should be close to your body. I like to wear my beacon right on top of the layer I am least likely to remove. If it’s a hot day, put it right on your super-base layer. If it’s a medium day, put it on your mid-base layer. You never want to have to take off your beacon, so do what you can to secure it in advance.
- Yes, a tutu counts as safety equipment + more. When you’re wearing a tutu, your friends ALWAYS know where you are. And to me that is important. Do I look like someone who can be unsupervised? NO! Plus, the tutu works as a bum warmer, a chair, emergency gauze in the case of first aid need, a pillow, and an instant icebreaker. Really, you should try one.
- You’ll need a backpack, so make it a good one. Before I was an adventurer, I dated someone who was an adventurer and scoffed when he said he owned seven backpacks. “What do you need SEVEN backpacks for?” I asked in confusion. Well, now I know. I own eight, and I really do need them all. But for a regular backcountry day nothing is better than a 30L pack, and I have to say I super love my Mountain Hardwear Scrambler 30. Figure out what size you need, go to a store to try them on, then buy the one that fits the best.
- Don’t forget your head: You can lose a lot of heat through your head – which is a good thing and a bad thing. My ears get cold, and I wear sunglasses, so for headwear I normally opt for a headband + sunnies. Other folks like to wear ballcaps. I also bring a (small) hat, and my climbing helmet (for the descent). If it gets really cold, my jackets have an abundance of hoods. Never tour in goggles unless you like them foggy.
- Weight matters, but safety matters more. I count ounces, but when your headlamp battery dies, you will wish you had brought extras. Be strategic with your luxury items, but bring a few. I’ve never regretted bringing extra sunglasses, gloves, batteries, or food.
- If your “program” works for you, stick with it. I continue to wear my blue REI baselayer top even though it’s super old and semi-falling apart. But, I like it and I don’t want to mess with what works. It has good vibes. I’m keeping it.
It’ll take time to get your backcountry setup dialed. It took me a while too. Rest assured everyone has suffered in this endeavor, and the journey will be well worth the effort. Once your master how to layer in the backcountry, you’ll be a seasoned pro!

Want more backcountry beta? Check out my archive of how to blogs.


just linked over from your blog on the Mountaineers web site. Great articles. I have 45 years back country experience and am also an engineer that has studies material sciences. A few things to consider in choosing layers:
in general, cotton, rayon and acrylic fibers are bad in cold and damp (they all retain moisture), and should be avoided even in a blend. Many fashion fleeces have acrylic fibers mixed in to get the bright colors, often not noted on the content label (labeling laws allow up to 30 percent acrylic to be labeled as 100 % polyester), so best to stick with performance fleece from known quality brands. stay away from any fabrics that has any amount of these fibers mixed in for winter use.
Polyester, polypropylene and nylon fleeces and stretch fabrics are generally good for outdoor performance wear. Nylon is the most durable, but does absorb a small amount of moisture (about the same as wool, polypropylene works well but not as tough. Wool is also excellent, but often people react to it (itch or rash), but is is also fire resistant (unlike the synthetic fibers).
Also, I find wool or wool/synthetic blend socks by far the best. I have never found any other socks useful in cold wet climates.
I do not find the micro fleece useful because it takes too long to dry out on damp days, I have gone to all puffy type insulating garments. the synthetic fill ones do not tend to get as damp and dry much faster. Fleeces is okay for day use, but I do not bring it on overnight outings any longer. besides it is bulky to pack up, and heavy, particularly when damp.
There are a new group of treated polyester and down fibers that are supposed to improve moisture management. Capalene long underwear was one of the first of this type, and it is one of the best as far as wicking away moisture from the skin. the idea is promising, but I have no personal experience with the treated down that supposedly makes it more moisture resistant. I too bring down puffy for end of day or evening wear (or for emergency warmth), and use performance synthetic filled puffy for day wear.
I buy a lot of my out door clothing as second hand stores and gear swaps. I have found Patagonia, Marmot, Arctyrics, North Face, Black Diamond, REI and other premium brands in Good will stores (shop carefully and regularly). I have also found that many of the synthetic performance athletic clothes such as running or team wear, and light fleece stretch pants, make much better under layers than costly name brand performance clothing.
And a note about fit: if the clothing does not fit well and allow you to move easily, such as easy stretch under layers, you will be more tired at the end of the day. clothing you have to fight with to keep moving will take more energy out of you as you hike, ski, bicycle, etc. too tight can be as much an issue as too loose.
^Unknown : thanks for reading and for your awesome and informative comment! I should have you on as a guest blogger – you seem much more informative than me in all things laying. Thanks for sharing.