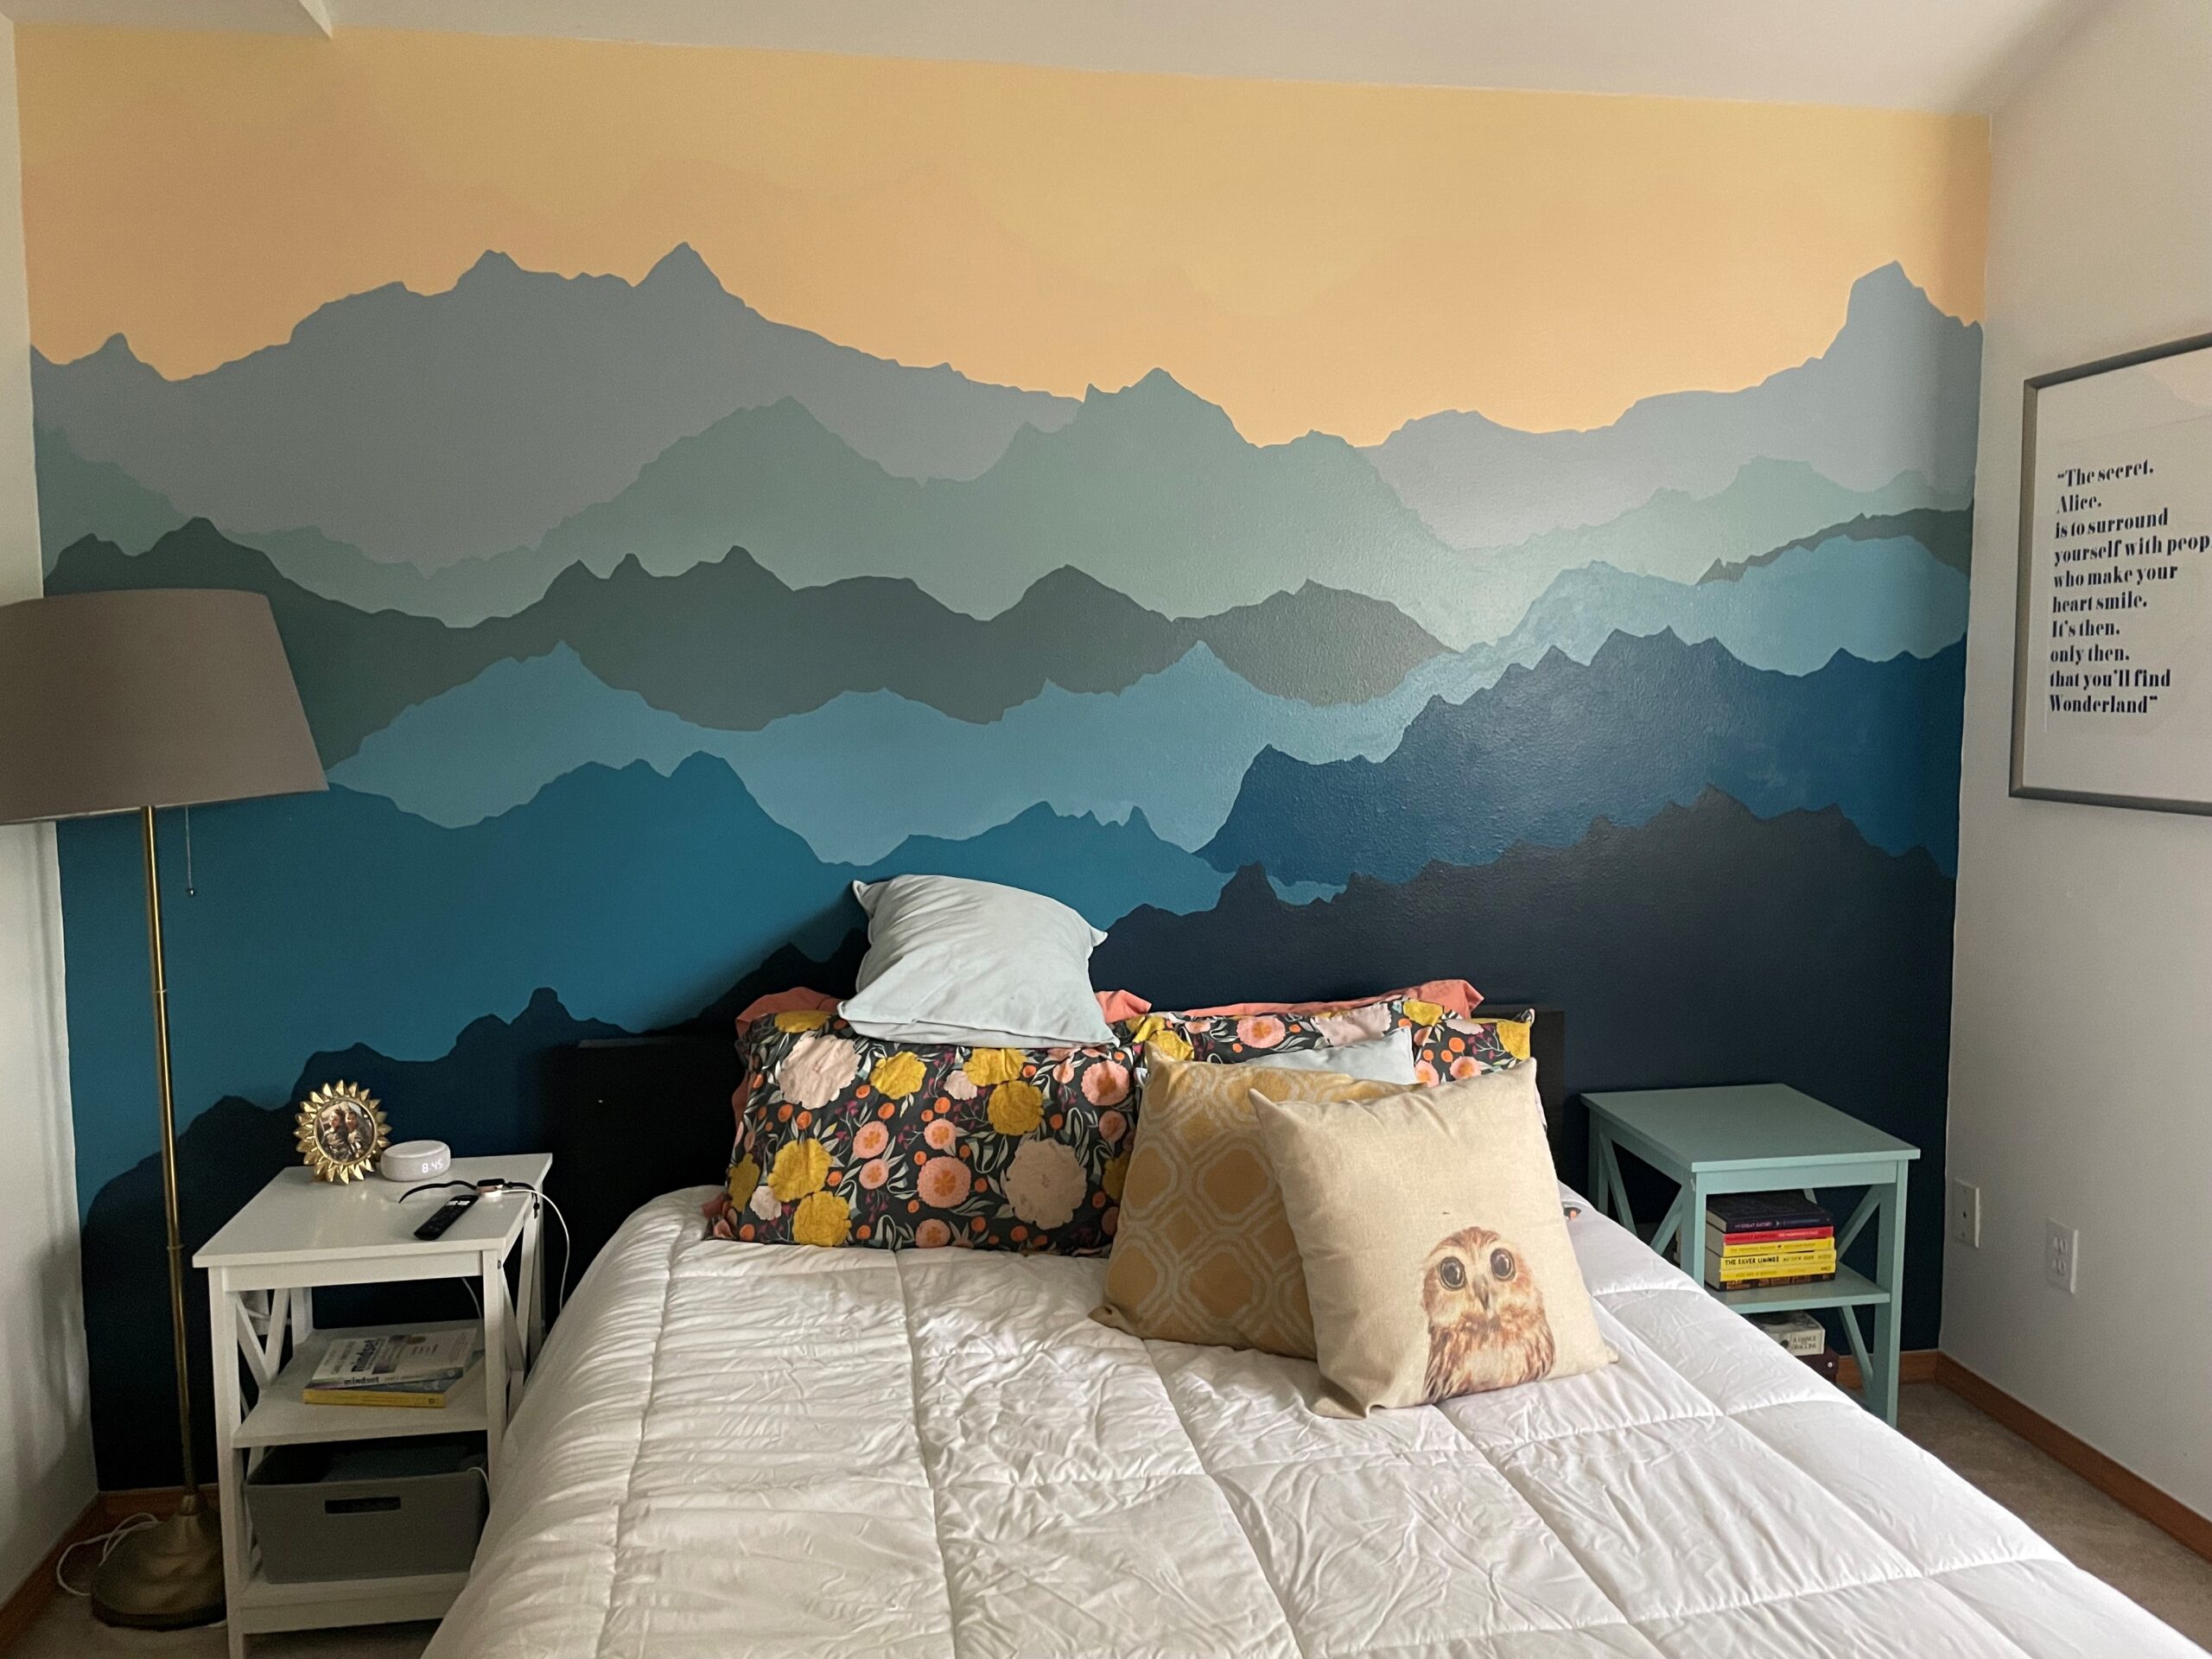
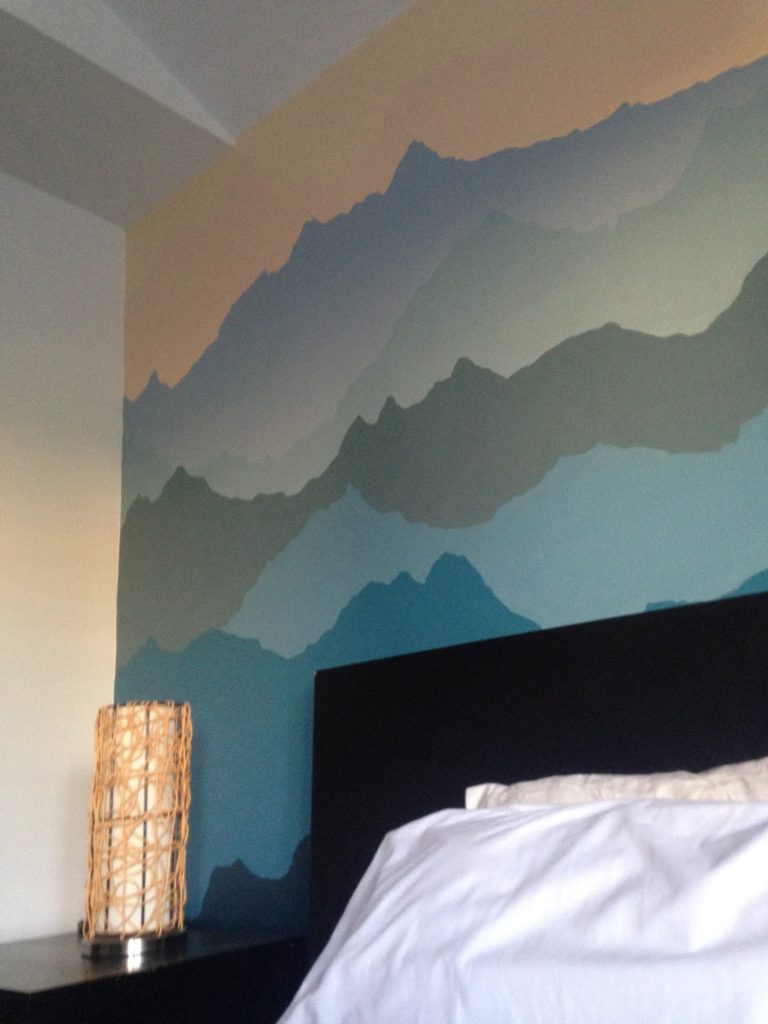
One weekend in 2016, I painted a mountain mural on my bedroom wall. I shared it on Facebook, and was surprised by the response. My best friend gave me the ultimate compliment when she said, “You PAINTED that? I thought you bought it at IKEA!” My life was complete! And now yours can be too.
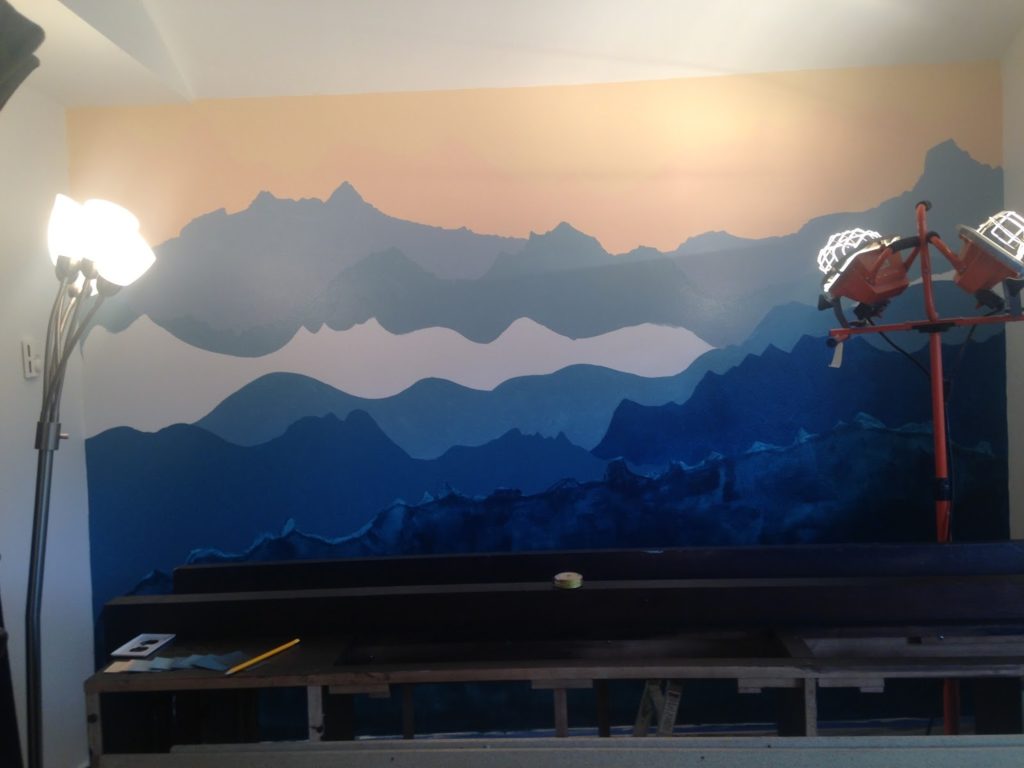
When I set out to paint a mountain mural in my new house, I found few resources online (namely this post and this photo). Nothing was definitive or seemed possible for a mere mortal, so I relied on luck and assumed I’d figure it out. After a few starts at stops, and about 16 hours of painting the 11’x8’ wall, I was done. It still brings me peace anytime I walk into the room.
If you are looking for a sign that it’s time to freshen up your space, here are seven easy steps to paint a mountain mural. These instructions below (in words then photos) are meant to be approachable and don’t involve any fancy shadows or shading. You can always add those later if you’re artistically inclined.
7 Steps to Paint a Mountain Mural:
1. Identify & prep your blank canvas. Locate an empty wall of reasonable size (you should probably own this wall, because you can’t take wall murals with you). Paint it white.
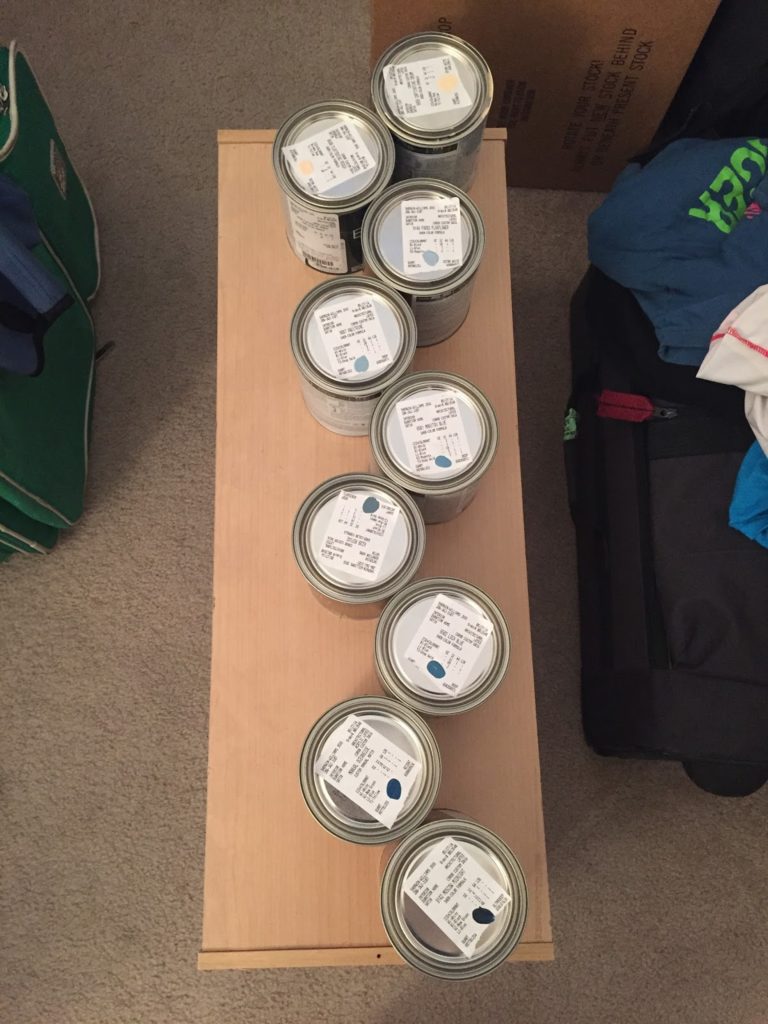
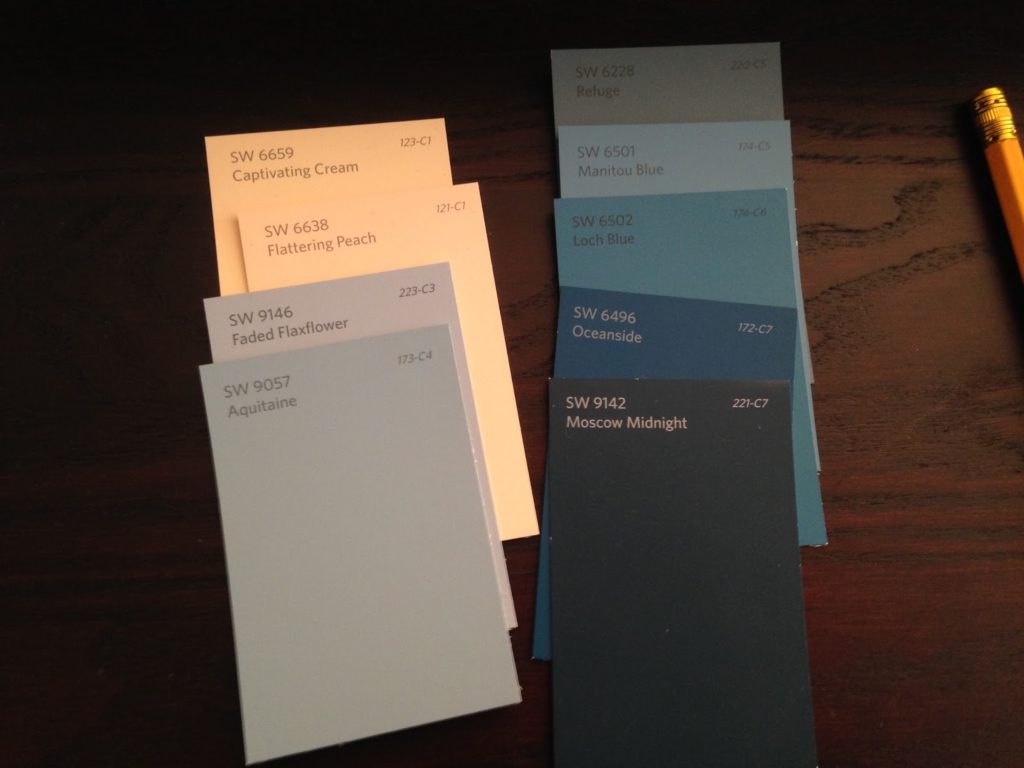
2. Select your colors. Go to the paint store. If you’re like me, you’ll spend at least an hour putting different colors in cascading order until you have the right mix for your masterpiece. I recommend 7-9 colors (odd numbers look better) in ½-1 pint cans. You’ll need enough for 2-3 coats of each color. (I thought the colors were the crux of the entire endeavor, and recruited my friend Lisa to help me. Here are the colors I selected in case its helpful.)

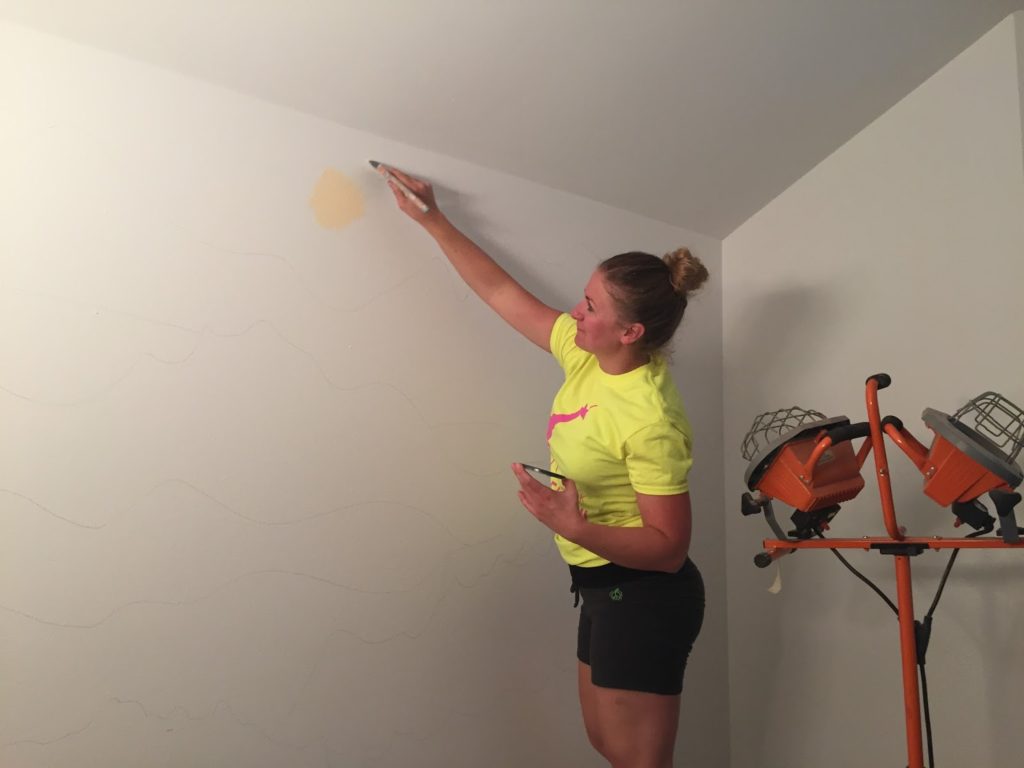
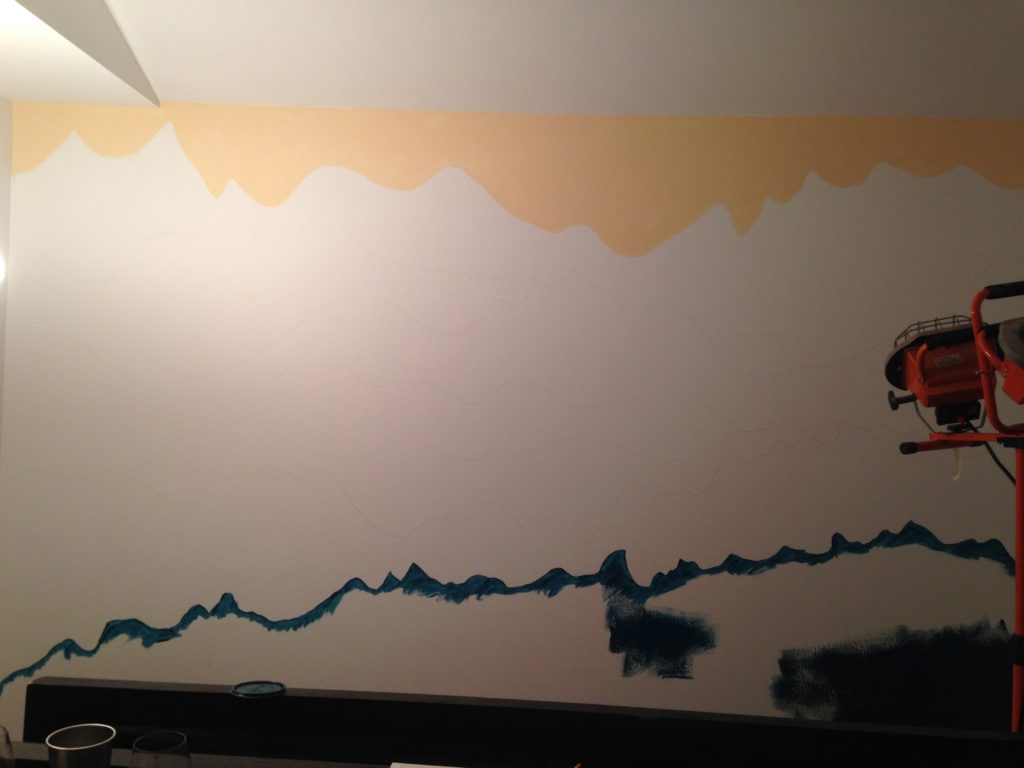
3. Draw your outline. Using a pencil, lightly outline the different mountain layers on the wall to provide a general idea of where you want the different colors to meet. This outlines do not need to be perfect – you’ll add details later – but I do recommend looking at a few mountain photos as inspiration. Make sure to note furniture will be located in front of your masterpiece. It will help you decide where to put your mountains/layers (for example, I painted a wider bottom layer than I might have because it was going behind a bedframe and nightstand).
4. Paint your first layer. I numbered my layers from #1-#9 from lightest (at the top of the mural) to darkest. I started on top, but should have started with the darkest color on the bottom (since it needs the most coats). The first strokes will be nerve-wracking. Use a big brush to give yourself a general outline and fill in the area. Later, you will come back and use a small brush to add detail.
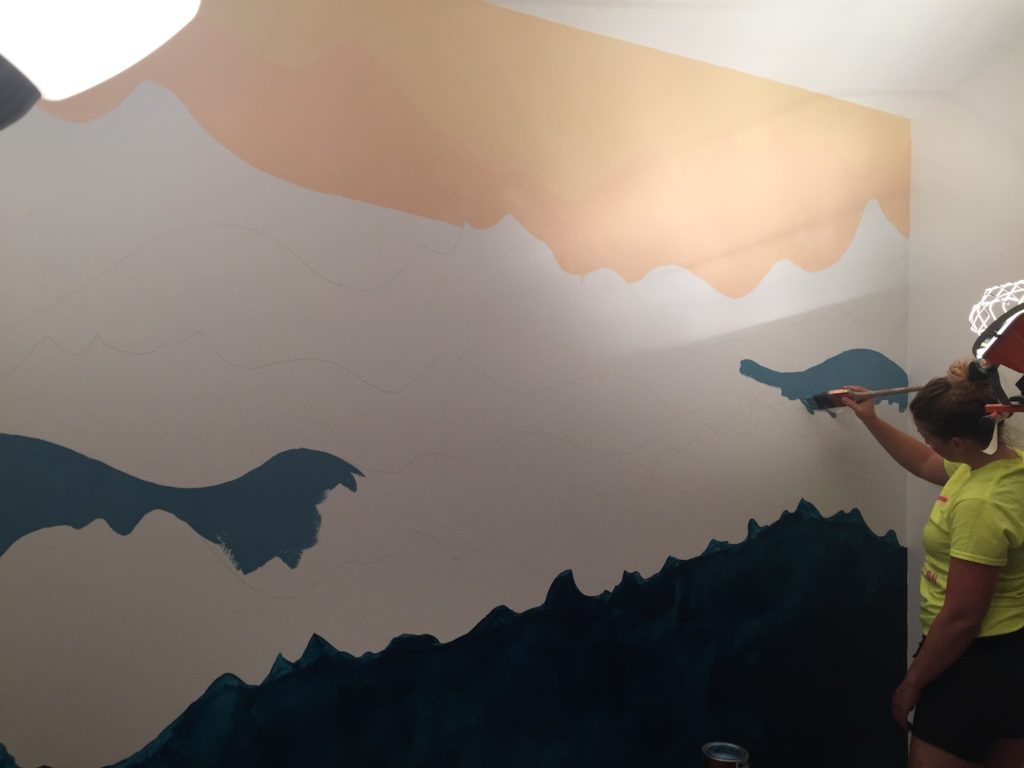
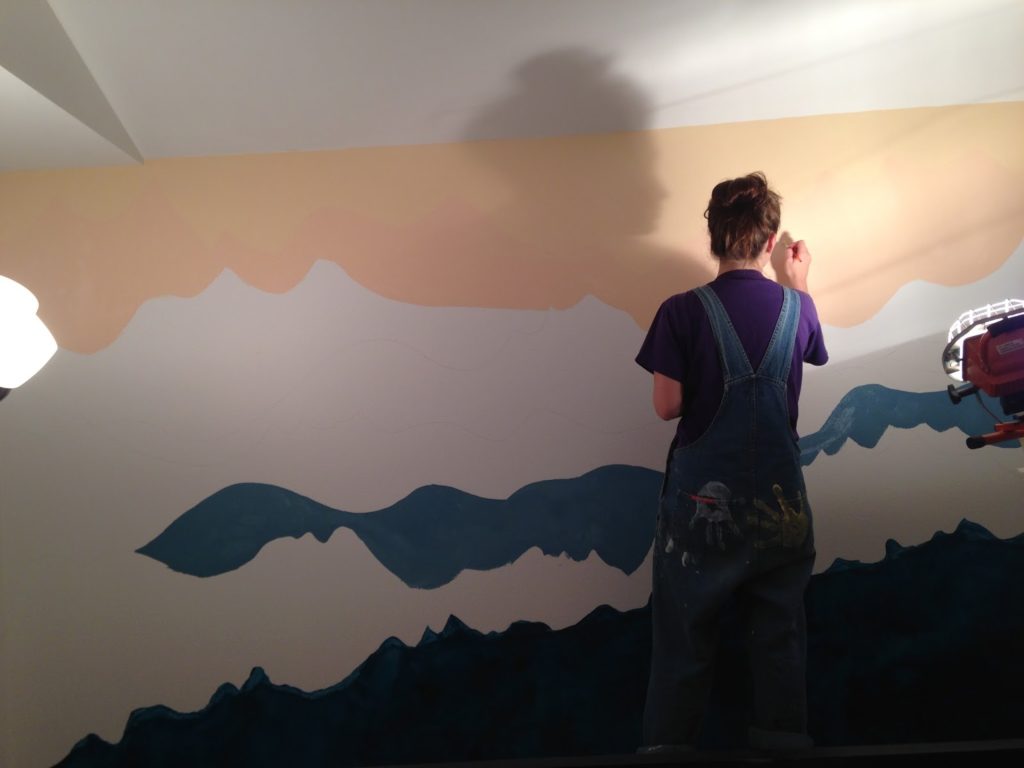
5. Continue to paint, alternating layers. You don’t want to be painting a new color next to the color that is still drying. Paint the bottom – or darkest – layer (in my case #9) first, then alternate at least one layer away so you won’t have any overlap. Darker colors will need three coats, and lighter colors will require two coats plus touch-up work. After painting the top layer, I skipped a layer to paint the next one down (#3). This allowed #1 to dry. Then I could paint #2 and so forth.
6. Apply your second coat. Taking what you learned on all of your layers in your first coat, paint your second coat. Now that you know what you’re doing, pick the method you think it best. At this stage, you can begin adding details along the edges if you want.
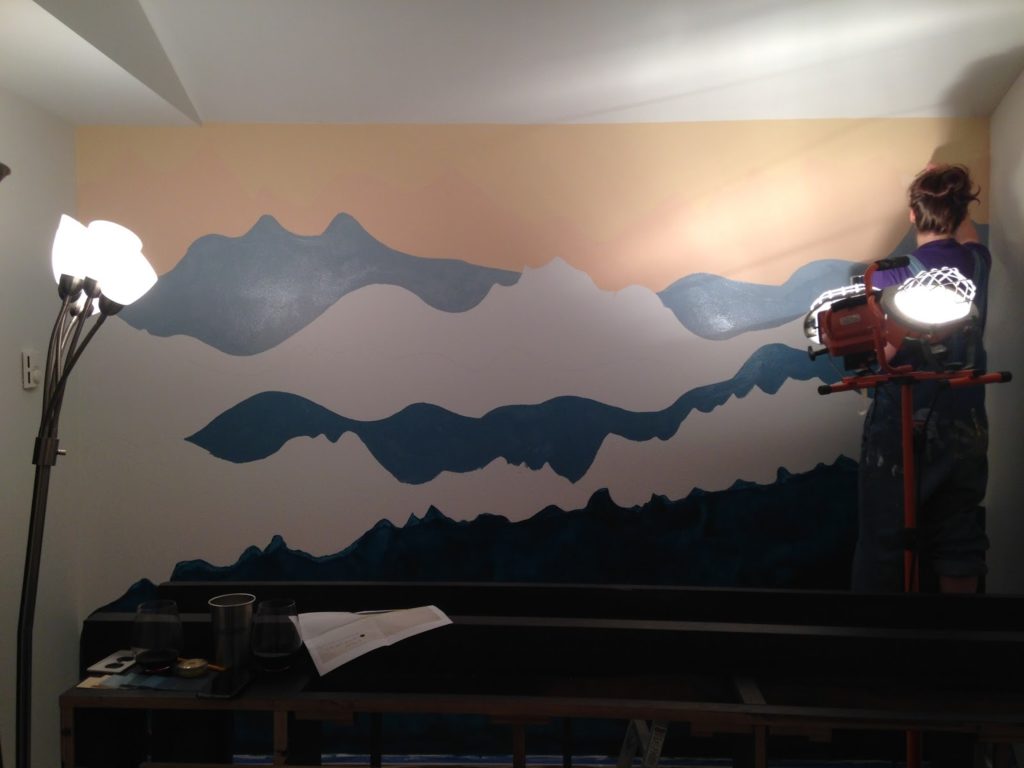
7. Add the detail. For the border, grab a small paintbrush and used paint #2 to add details overtop paint layer #1 along the top of #2. You’ll likely need to go over the detailed borders twice. You’ll always want to paint the details as though they come from the “bottom” layer onto the top layer, which is why I used paint #2 to add details on top of paint #1, and used paint #3 over top #2, and so forth. This assures the bottom layer is more prominent in its detail.
Enjoy your space! That’s it, now it’s time to put your furniture in place and enjoy the fact that you’ve brought the outdoors in. Kick back and enjoy the view.
Tips to paint a moutain mural:
- Set aside a few days to get this done. I had the room taped/prepped to cover up a hideous red paint from the previous occupants. Prep always takes more time than you think it will, so plan accordingly. Painting my mountain mural took about 16 hours (for an 11’x8′ wall).
- Get flat paint. Paint comes in different ‘sheens’. Higher sheens are shinier and more durable (that’s why higher-gloss is used in bathrooms). Flat paint has no shine, followed by eggshell, satin, semi-gloss, and high-gloss. I got an eggshell, but wish I had gone with a flat paint, even on a textured wall. Flat paint allows you to see your artwork better.
- Spend money on good brushes. Get a big brush for edging and general application, a medium-sized brush for touch up work, and a very small brush for the detail work.
- Embrace imperfection. My outline started with parallel and sweeping lines – it’s natural to make a perfect mound with a paintbrush – but once you fill in the colors, it will look like Dr. Seuss took a mountain-shaped poo on your wall. Take a small brush and create smaller bumps and mounds and sharp edges. Imperfections are good. They make the landscape look real.
- Remember this is an investment in your new home. The paint – plus painters tape, plastic, and brushes –ran me $200 (in 2016). This ain’t your kids paint-by-number.
How To Paint a Mountain Mural in Photos:

Did you paint your own mountain mural? Tell me about it!
I’d love to see your work and answer any questions have. Thanks for reading – I hope this inspires you to bring the outdoors in to your own home. For even more outdoor inspiration, take a stroll through my past blogs.


I like your blog a lot. Its informative and full of information. Thank you for sharing.
Great post
I'll be starting this weekend! Thanks
Awesome @Suzanne Rose! Let me know how it turns out!
I like your blog a lot. Its informative and full of information. Thank you for sharing.
How do you know how much Paint you need? I know how much Paint is needed to Paint a wall in 1 Colorado but of you use so many Colors it's difficult to know how much to buy of eacht color! I don't want to end up having not enough of one color. But top much leftovers is waiste….
@Anonymous – I ended up with extra paint, and I don't think there's any way around it. I suggest buying the smallest sizes, then you can always get more if you need it. The small pints that I bought are pictured and I'm not sure if you can go any smaller than that.
Thanks for sharing. I've been contemplating doing this myself! Bit scared of it looking literally like 'paint by numbers'. Yours does look good! Did you put a 'shade' on the lighter colours, that's the look I hope for. It looks 'blended' or is it next colour mountain having that effect?
@Unknown – thanks for reading. I did not shade the colors at all or blend them. I just used those colors and made clear lines between them. Any shading that appears is just a result of the colors next to each other! I thought about trying to shade them, as it would look more natural, but I just didn't want to put in that amount of effort 🙂 Good luck with your project!
This comment has been removed by a blog administrator.
Hey I’m about to try to do this for my brothers nursery.
Just wondering for timing how big was your wall?
Also all of those are just straight solid colours you didn’t do any shading at all?
Oh and why flat paint did you feel like it showed too many imperfections/brush strokes?
Did my first mural on an outdoor concrete wall on our bottom deck/porch using yours as a guide. Came out great! I’d send pics but I’m not sure of your email. Tks for the inspiration @jrandcat on Instagram
Well, I am about to jump into this project, purchased paint at least 2 months ago. I find it hilarious that I picked your mountain painting blog to read. I’m about ready to walk up the street and borrow a few more paint colors from you.
Thank you for all the great advice above.
Cheers,
Courtney Carolan
2 blocks away
Yay!! I’m so glad you’re doing it! I don’t have much paint left but happy to help with a virtual consult! Give me a shout on Facebook!